Quick Checkout allows users to quickly reserve and send multiple orders with a supplier, or multiple suppliers, with fewer clicks.
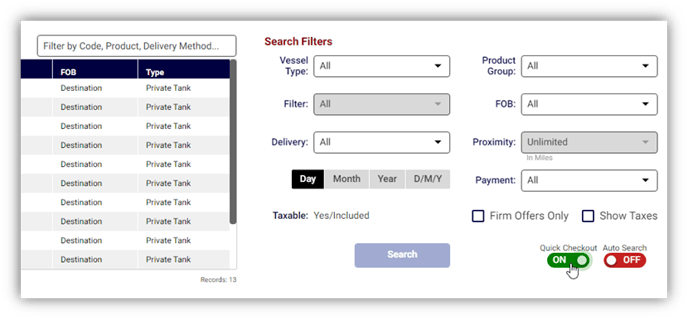
To utilize Quick Checkout, navigate to Find Fuel and switch the toggle for Quick Checkout from OFF to ON.
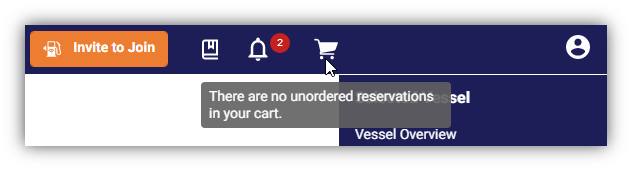
Now, when you hover over the cart icon in the top right corner of your screen, you will see that Quick Checkout is enabled.
Next, you can sort pricing as necessary and proceed to place orders. Quick Checkout cannot be used for outright prices (prices with dollar amounts). After enabling Quick Checkout, the calendar buttons in each row will now be available.
There are two ways to use the Quick Checkout feature. You can either select and add individual loads to your cart for each of your tanks from the pricing grid, or you can order multiple loads for a single tank by using the calendar button option.
For the first method, individually add orders to your cart by selecting an order for a particular tank, then moving on to the next tank in need of fuel. As you add loads, they will appear in your cart. Click here to review a detailed guide outlining this Quick Checkout method.
This guide primarily focuses on the second method, which uses the Calendar button. As shown in the image below, select one of the calendar buttons for the corresponding product and a modal will appear.
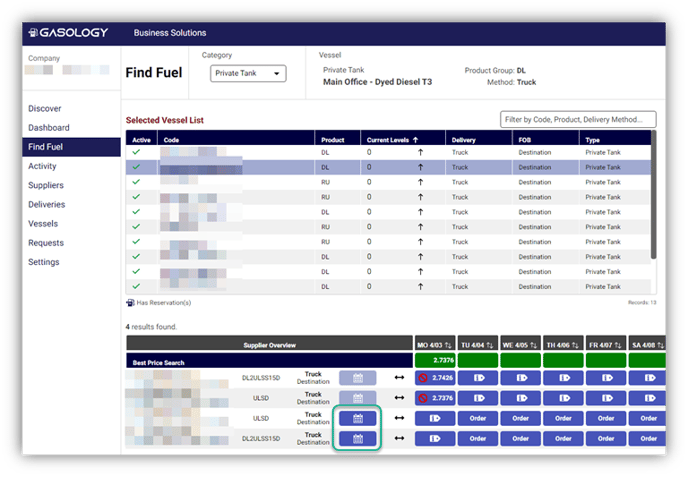
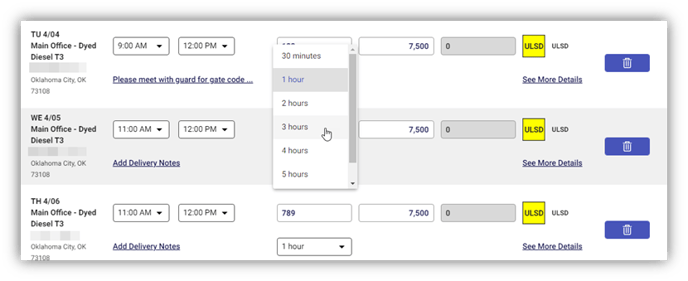
Here, in the calendar shown at the bottom left of the modal, dates for ordering loads are available. Select each period you would like to reserve a load for. As you select periods, rows will populate in the table with fields for PO #, Quantity, and delivery window. PO # is optional while Quantity and Delivery Window will be set to the default values pulled from the vessel’s Profile details.
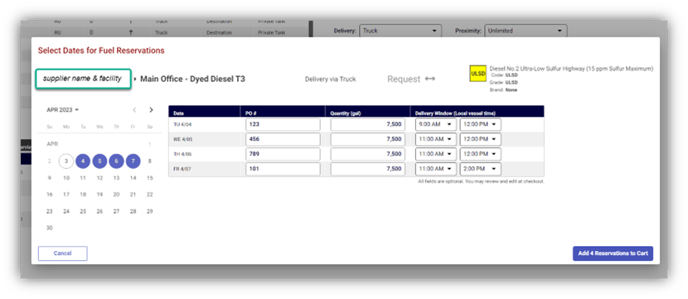
In the example above, orders were selected and placed for April 4th through the 7th. PO numbers were also entered with modified delivery windows.
NOTE: Use the Enter key to move down in the load table or use the Tab key to move to the right through each row for easy data entry.
After your loads have been selected, click the Add Reservations to Cart button and the loads will be pushed into your cart. You can now continue shopping for loads or go to your cart to send the requests to your supplier(s).
Should you continue shopping, as you select periods, you’ll notice a count for the number of loads in your cart will appear on your cart icon.

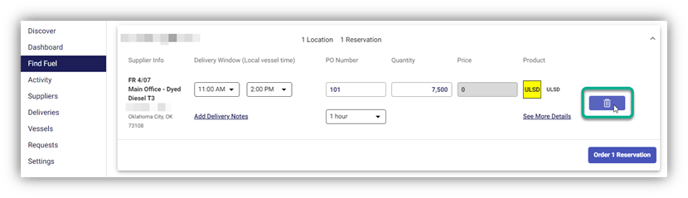
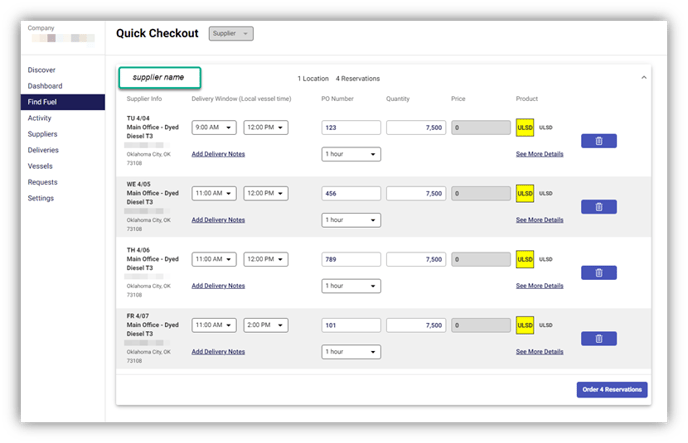
When ready to send your reservation requests to your supplier, click on the cart icon and you will be taken to the Quick Checkout page. Here, loads will be organized by supplier in cards. Cards can be expanded or collapsed as needed. One expanded card is shown in the image below:
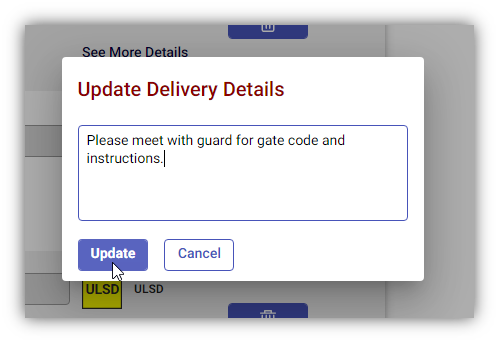
If you have specific delivery notes to include for your supplier, click on the Add Delivery Notes link and a modal will appear. Click Update to save your changes.
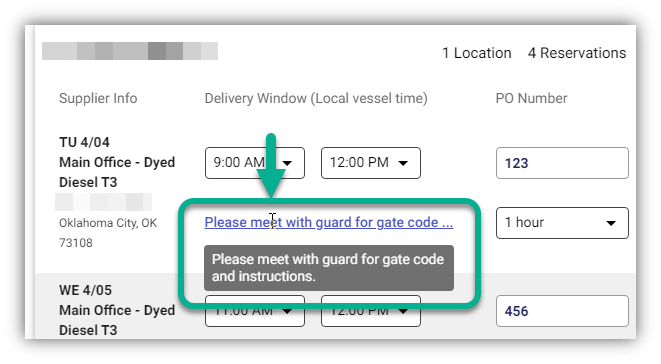
Now, when hovering over the updated notes link, you’ll see the updated notes in a convenient tooltip.
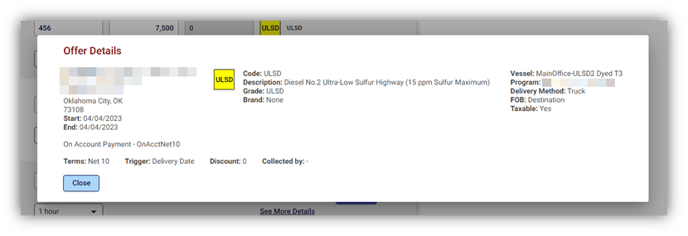
You can also click on the “See More Details” link for each reservation for details on the delivery address, product codes, tank details, and payment information.
After entering the PO numbers, delivery times, and quantities for delivery, modify the time for how long each request is valid. This selection will set how long your supplier has to confirm or deny the reservation request.
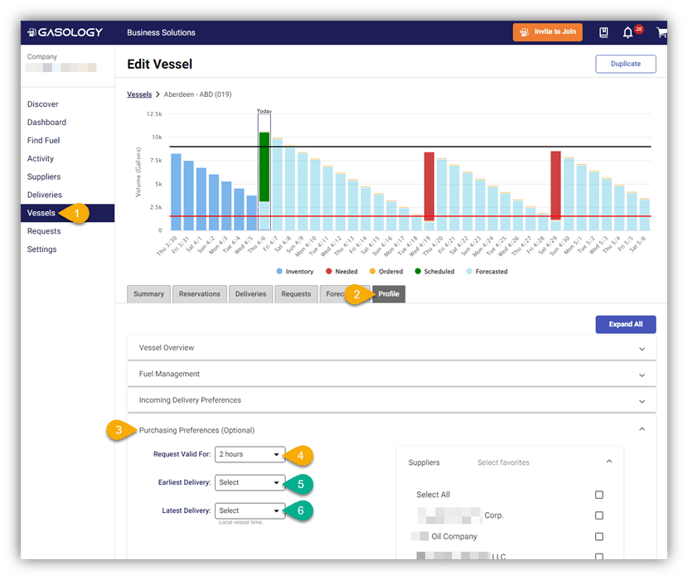
Increase your speed: You can also set request time and delivery window values to a default value by navigating to Vessels > select a vessel or tank > Profile tab > select the Purchasing Preferences (optional) card to expand > and update the “Request Valid For” field.
You can also update and save your standard earliest and latest delivery times as shown in the following image. After making your selections, click save and those default values will then appear in the Quick Checkout window when reserving fuel in the future. Repeat this process as necessary for each of your tanks.
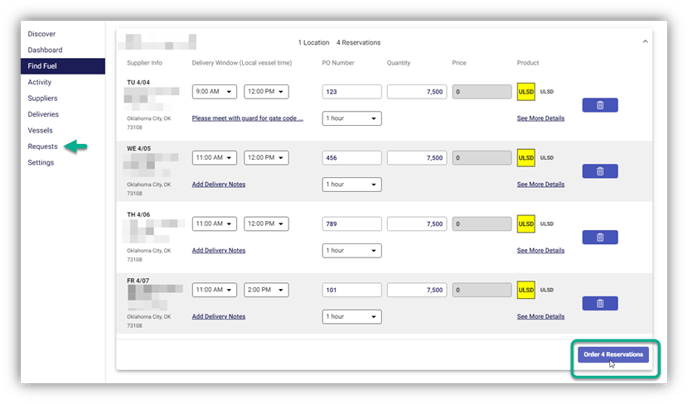
Finally, once you’re ready to send the reservation requests to your supplier, click the Order 4 Reservations button. Your supplier will receive an email and in-platform notification for each of the orders. After the reservation requests are sent, you will receive a send confirmation for each individual reservation.
You will also be able to view your reservation requests after sending them by clicking on the Requests Manager.
If you would like to remove a load before ordering your reservations, you can also select the trash can icon to remove a load from your cart. If you would like to re-add a load, click on Find Fuel then select the appropriate order and return to your cart.