
You can also add vessels by using the vessel import tool. Using the vessel import tool allows you to add all your company’s tanks in a single operation rather than manually adding them one by one.
Start by navigating to the Vessels manager.
Click the Import button located in the top right corner of the screen.
The Vessel Import window will appear, click Download Template. 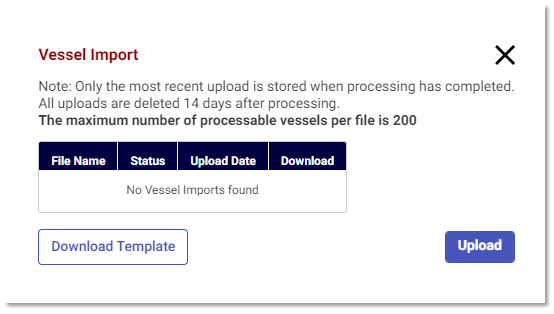
Complete one row for each of your tanks, a maximum of 200 vessels is supported. If you have more than 200 tanks to import, run the vessel import tool again to import any remaining tanks.
First, enter basic tank information like vessel name and code.
Next, key in or select an option for each of the following fields:
- Vessel Type - Select an option from the dropdown. For fleet and gas station customers, "Private Tank" is most common.
- Description: Enter a vessel description.
- Product Group: Select the product group that is used for the vessel. If the vessel stores diesel, select "DL."
- Search Type: Select a search type option from the dropdown. "Private Tank" is most frequently used here.
- Sales Type: Sales type defines how taxes are applied to the fuel. For fleet and gas stations, "Leaving Wholesale" is generally the standard.
- FOB Type: Select Buyer
- Delivery Type: Choose your delivery method.
- Delivery Details: Enter any helpful delivery details your suppliers should know about for each vessel (optional).
Then, enter a valid mailing address for each vessel location.
Finally, if available, enter ALL fuel management properties:
- tank size
- tank capacity
- inventory level
- reorder threshold
- above ground- true or false
If you do not have information for each of the fields mentioned above, skip those sections for each vessel.
NOTE: providing incomplete tank inventory information will result in a failed vessel import.
Once you have entered all relevant information for your vessels, save the template and return to the import screen where you downloaded the template. Click the Upload button and select your completed file. Once uploaded, the status will show “pending,” you can hit the X on the top right of the import box.
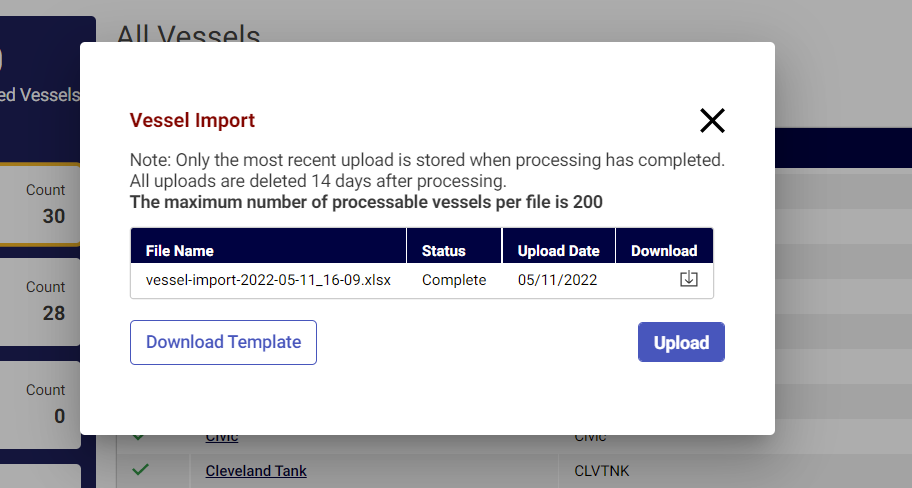
Select the Import button again for an updated status. The status will say “Complete” if your filed was loaded with no errors. If there was an error in file, the status will display as “Complete_with_errors”.
Return to the Vessel manager page and reselect Import. This will show the file you previously uploaded, re-download the file by clicking the arrow.
The first column on the excel spreadsheet will show the Results of your previous upload. Tanks that were successfully imported into the platform will say display as SUCCESS in green.

If there is an error, this cell will be red and show the error code with this row (For example, Duplicate vessel name or code, incomplete information).
Make any required corrections to your file, save, and re-upload your corrected file on the vessel import screen
After successfully importing your vessels, click on any vessel to be taken to the vessel's inventory management tool.